Monday, January 24, 2011

Update and project planning

So, if you're one of the 2 people who probably read this blog, you might be asking yourself "What is the deal with Nikki? She NEVER blogs anymore!" I know I'm pretty bad lately. We've had a busy month around here. We found out our little cakelet wasn't hearing very well (only 30%!!) so we had tubes put in to drain fluid and it has been amazing. What a huge difference it has made. I'm so sorry we didn't do it sooner. In addition to the surgery, we also had her first day of Preschool. It has been a little rough on this momma but, like many moms before me, I will make it through!

The good news is I need to keep myself preoccupied during the time I'm home alone so I forsee a serious surge in my baking projects! I've even made some dinners. If you know me, you realize this means it is possible that hell has actually frozen over.

I am working on making an amazing apple cupcake that I will reveal in a later blog. I am also working on a fun craft for the CCM that I will also be showing off. Assuming it all goes as well as I hope of course!

So stay tuned and I promise to do something amazing soon! ;)

And, because you know you want it, here's a picture of the sassy diva herself posing for her first day of school.

Tuesday, January 11, 2011

The Cake Chemist does cookies??

It appears the Cake Chemist has been a pretty good girl this year because Santa brought her several great goodies, but two that are going to make cake projects much easier. The first one is a new KitchenAid mixer!! When I opened the box, I'm pretty sure I heard a choir of angels start singing. I now understand why people would look at me like I was insane when I said I was using a cheap hand mixer. This thing is so great. If you don't have one, go get one. Don't pay your mortage this month if you have to. (This is a joke - I do NOT endorse skipping payments on your house!)
Isn't it beautiful???

He also brought me a Cricut Cake tool kit. I wasn't sure how helpful this would be, but I love having extra tools and gadgets so I asked for it. I'm glad I did! If you don't have this for your CC, you should seriously consider it. Before this, I would use a small sharp knife to cut out the smaller pieces. If you know me at all, you know I do NOT need to be playing with knives! Ha ha!


So, to get some good play time in with my new toys, I decided to try something new with my CCM - making cookies! I mixed up a quick and easy recipe from my girl Martha for some sugar cookies and rolled them out before throwing into the freezer. This worked great as they were ready to go as soon as I was! Plus, you don't have to cook them all at once, which is definitely a "good thing" when you have no self control. (like me!)

Important disclaimer - I do not make cookies often. I kind of hate making cookies because of the whole short cooking time thing. I loose interest and burn them usually. Also, I hate rationing out portions. Anyone who has seen me cut a cake will tell you I know nothing about portions!

I was so surprised how easy this was. It's easier than cutting fondant because you don't have the problems with stickiness or being dried out like the fondant. The worst problem I had was with the thickness. I wanted it to be thick so it's not too crispy.  


Feeding into the Cricut
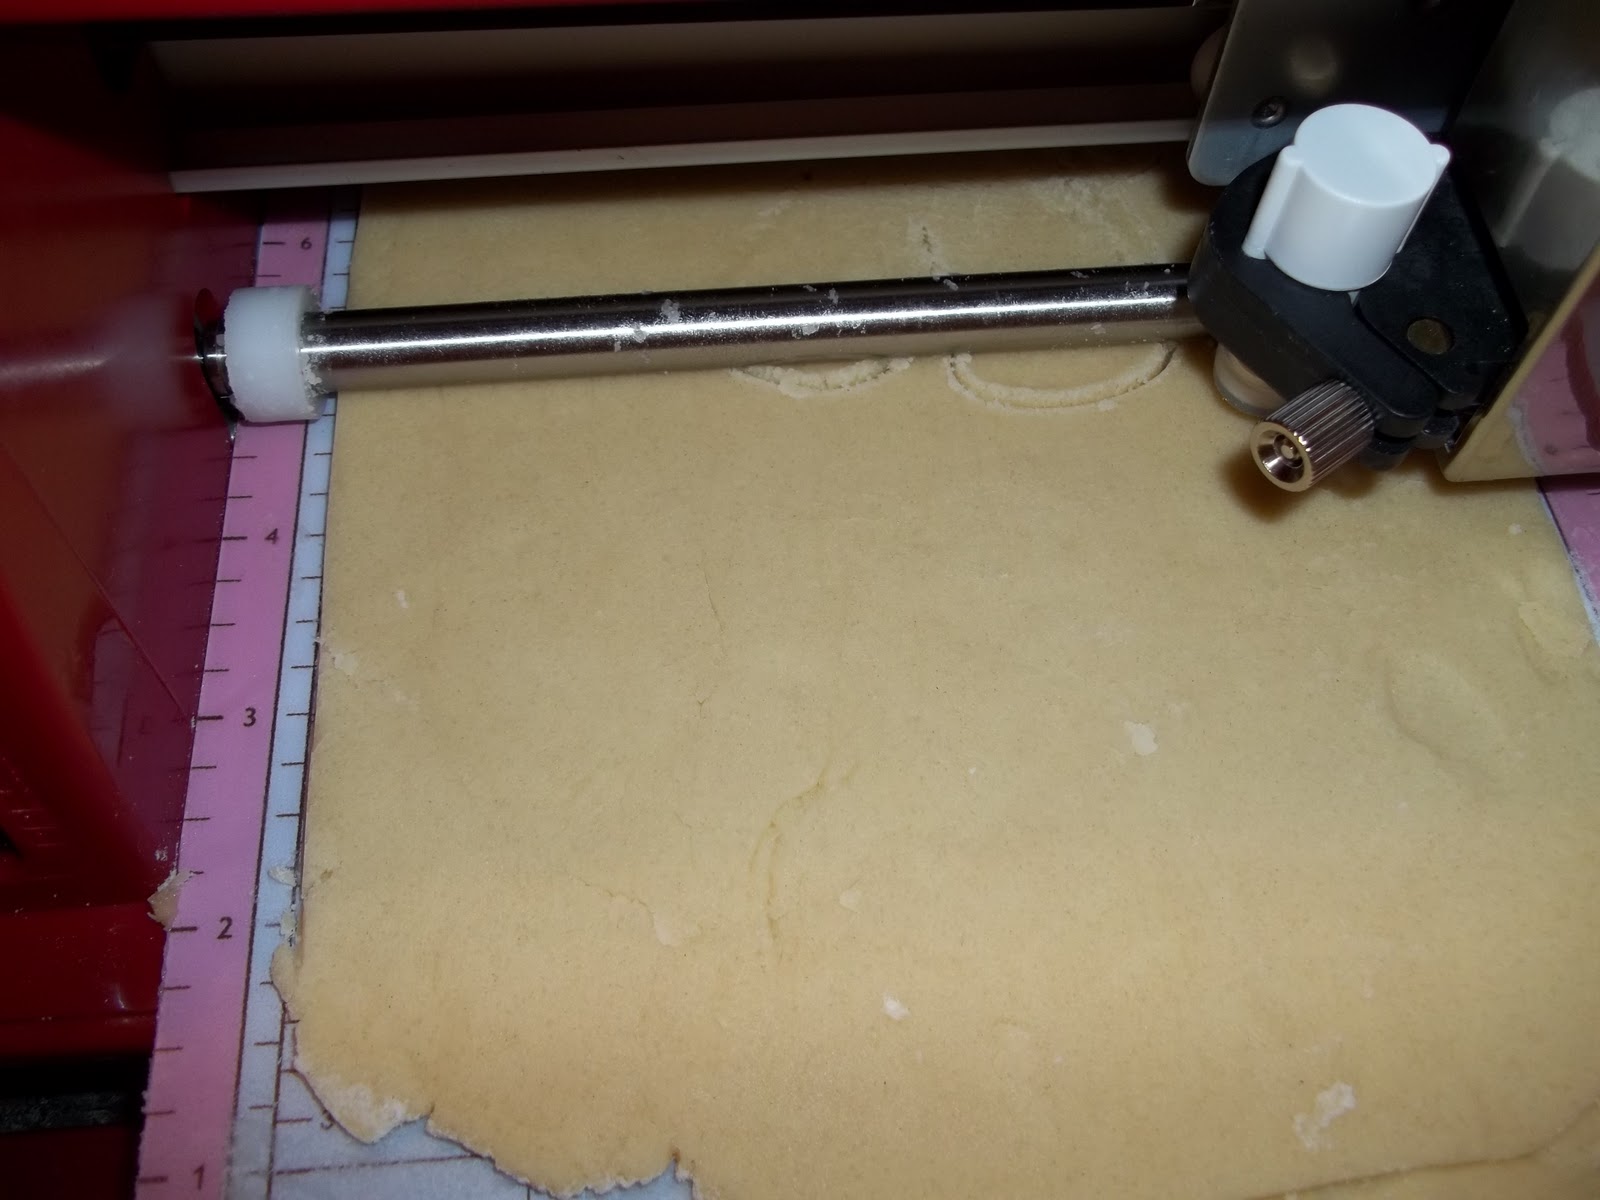
Cutting the dough


Like I said, I had a bit of a problem with the height of the dough versus the rollers in the CCM. Basically, the rollers would smooth out the dough. It wasn't too big of a deal because you can just peel it out regardless. I guess the sides might not have been perfectly smooth, but this is a cookie, so the sides are going to spread anyway and it will look good after baking anyway.

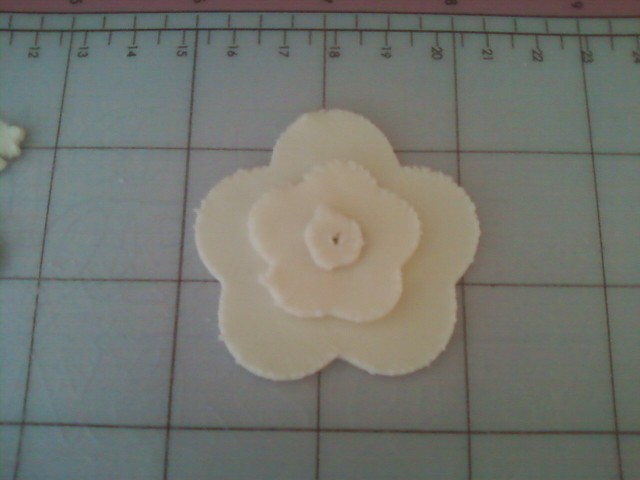
Here they are all cut out on the cookie sheet. I made one small one because I ran out of room on the mat to make them all the large size. The final verdict was they are fun (my 3 year old) but the 3 inch size is way too big for one cookie (my husband).


This brings me to another point - the sizing. It's a little confusing how to figure size on something like this. Notice it is not a square shape. The wing-to-wing size is definitely longer than the head-to-tail. So how do you figure how big each side will be? Well, this is a question I have yet to figure out. Unless I have a helpful reader to point me in the right direction, I'll probably have to ask my old friend Google for answers!

Friday, January 7, 2011

It all comes together - the Cricut Cake cake!

If you remember, I said in my previous post that I had 3 days after the CCM arrived to make an amazing wedding style cake. I was pretty excited about it because it was my first attempt at anything like this. So, before I go into the decorations, let me give you a little background on this cake. My cousin called me and basically said that she wanted a cake for her parents surprise 25th anniversary party. It took me a while to figure out what I was going to do exactly because her initial explanation was a cake with the wedding colors "like Cake Boss would make" which (if you've seen the show) could mean anything! The wedding colors were pink and red which was hard for me to imagine looking anything but tacky. Part of the challenge I guess. I told her I was looking for an excuse to try out fancy formal cakes and she agreed. Mostly because I also said I'd make it as a gift to the couple I'm sure!

So, we agreed on one tier vanilla cake with strawberry filling and one tier chocolate cake and chocolate ganache. The biggest challenge I presented myself inside this cake was to make the filling myself! Usually, I'd use preserves but I wanted to see if I could do it myself. So I found a simple syrup recipe and used fresh strawberries. This made for a very stressful baker as I never knew what was happening inside my cake and had severe anxiety as I waited for the couple to cut the cake. But it turned out great! I had read that you need to crumb coat both layers of cake before adding filling to prevent the cake absorbing the filling. This was very necessary as my filling wasn't as thick as I would have liked. It worked out though, as the thinner filling just absorbed into the cake AFTER cutting and had delicious favor.

As I said, I iced the outside with a basic buttercream. I did a crumb coat then refrigerated to harden followed by another thin layer of buttercream. For me, I think this is the easiest way to get a nice, even coat on my cake. I then rolled out white MM fondant to cover each layer. I also colored & rolled out layers in both red and dark pink. I put them in the freezer while I worked on smoothing the cakes. I haven't yet mastered smoothing the base of the cake to perfection, so for this cake, I opted to use a red ribbon to hide my imperfections. This is the best way to solve cake problems! Ha ha!

So the CCM designs were much easier using my freezing technique and it took no time to cut out the decorations. I made two-toned flowers which I let dry on an upside-down egg crate to create a 3D shape. The only problem I had was that I'm used to making the designs a day ahead and then using moist paper towels and Tupperware to store until use. This didn't really work for these because they are more intricate and just got too wet and gooey. Not a big deal, because I just cut more out the day I put the cake together. Another lesson learned, CCM makes things easier so you can just cut, set on cake and go!

This is a close up of the designs I used. I thought the heart design was pretty cute. Then I saw it in real life and didn't like it but had basically run out of time to change my mind. Luckily the flowers really stole the show anyway because they were so cute. I love the swirl designs and I really wish I had focused on those a little more.

Here's a close up of the flower again and a little more of the ribbon.

You can pretty much tell from this picture that the wording was by far the hardest part of the process. I had the best luck when I rolled the fondant out a little thick and then used a very sharp little knife to help with the detailed parts. I'm sure this is something that will get easier as I go. I was still pretty happy with the way it turned out.

The finished product. Side note here: I did not see the topper before I made the cake. If I had, I would definitely have tried to incorporate some silver into the cake itself to help it match better. Still turned out pretty good for my first formal cake. I'm pretty impressed with myself!

Saturday, January 1, 2011

More adventures in Cricut

So my biggest problem with the Cricut is that I have a job and a kid and no time to play with it! HA HA! Seriously, though, you need time to see what works best for you. I have only tried cutting marshmallow fondant so far as this is the only fondant I use and make myself. I know Cricut sells their own frosting sheets (of course) but I'm way too cheap for that and, realistically, I'm not going to run out and buy a specific colored sheet of frosting every time I want to make something!

Back to my attempts at cutting. If you remember from my last post, I had trouble with warm, soft fondant. I also learned to ease up on the pressure. We're cutting fondant, not wood! So, after my not so great attempt, I rolled the fondant to varying thicknesses and stuck it in the freezer. I actually am not great at rolling fondant to equal thickness, so this part was pretty much an accident, but ended up being pretty helpful as I learned something else - there is such a thing as too thin! I found that the suggestions for 1/8-1/4 are correct. I actually like it a little thicker personally. This is because not only does it lessen the chances of my fondant squishing up while I cut, but since I use mm, it stays harder if it's a little thicker.

After a couple more disasters, I managed to cut out a couple of successful designs! I'm pretty proud of myself at that point. I had a bit of trouble with the snowflake coming off the mat, but that's another part of the process I think.


I also messed around with sizing a bit and found that a little change in size makes a big difference. It was so easy to layer this design to make a really cute flower!
The edges looked a little rough, but I can even them out easily. After working with the machine for a bit, I was able to cut out some more detailed  designs, even half of the "Happy Anniversary" I tried before! I guess that means I'm halfway there!

At this point, I have 2 days to finished an amazing Anniversary cake. The pressure is on, but I think I know how to use this thing now. Well, I guess we'll find out for sure soon enough! Stay tuned...