Thursday, December 30, 2010

Why having a birthday on Black Friday is awesome

***NOTE: I realize this post is from over a month ago - I just didn't get around to it yet! I'm working my way through all the blogs I missed over holiday craziness!***

It's pretty much the opposite of those poor people who have a birthday right around Christmas. November is late enough in the year people start getting into buying gifts, but far enough away from Christmas, they don't try to combine them. Plus, since everything is on sale that day, my gifts are bigger than they probably should be. If you can't tell, I love presents. I spent the first 10 years of my life as a spoiled brat only child. Apparently, that's something I'm not going to outgrow. I've decided to accept that.

So, this year for my birthday I scored an awesome cake-related present - a Cricut Cake!! I actually opted for the mini even though the Martha Stewart edition was on super sale on Amazon. You know I love Martha. Seriously, I do. But, I read reviews and they were pretty mixed about this thing. Some people think it's "too perfect" (as if there is such a thing!!) and some people called it a waste of money. I thought with the mini I wasn't wasting too much (of someone elses's) money and it takes up about half the space which I really love since I get anxious around too much clutter.

So, after reading tons of reviews and suggestions and message boards, I felt pretty ready to try it out. Look how cute this thing is straight out of the box! (I put my hand in for size reference but keep in mind I kind of have man-hands!)


 It came with lots of information which I didn't really read. There was a DVD which I watched. After that 10 minutes or so, I felt very informed and prepared! The machine came with a "Cake Basics" cartridge and I bought "Holiday Cakes" at the same time so that I could make fun Christmas cakes.


Because I like to live in a constant state of stress, I had agreed to make a 25th anniversary cake 3 days after I received the machine in the mail. Nothing like a timeline to help you learn! Anyway, I dove right in using mm fondant to cut out a "Happy Anniversary". I immediately learned 2 important lessons: First, make sure you check the pressure because mine was set all the way on high and now I will forever have this design in my mat! Secondly, the message boards were right about warm, soft fondant. It will not work, it will just turn to mush like mine did.


So this was my first rushed attempt to make the Cricut work. I promise it will get better. After this attempt, I rolled my fondant out very thin and put it in the freezer. I found a good way of doing this was to roll it on the Cricut mat, then put it to a flat surface (I had a plastic cutting board) and separate the layers by saran wrap. I then kept them stored in my freezer so they are ready to pull out and play with when I have time. Next blog I will show you how it worked after freezing and more of the Cricut Cake learning curve.

Wednesday, December 29, 2010

Something a little different....

So in the spirit of the holiday season, I tried something a little different - meringues! Who knew they were so easy?! I found a recipe that was simple and got a little creative with it. I know some of the recipes use cream of tartar and other stabilizers but I didn't really find all that necessary. These turned out light and melt-in-your-mouth perfect!

For the record, I had a 3 year old helper decorating these so the candy cane coating is imperfect but that's what holiday cooking is about in our house!

Maybe I should have tried some of the stabilizer ideas for other flavors because here's what it looks like when I tried to make a dark chocolate version. I think the chocolate bits melted the egg whites a little. These were crispy and delicious if not as pretty to look at as the other guys.


I also made some with an eggnog extract that turned into complete ruin in the oven. There are no pictures because it looked too gross to share!

But the best flavor was by far candy cane! I made several batches of these. And, I think this would work with any hard candy so you could do several flavors. Imagine a Butter Rum! Mmmm......OH! Sorry, I might have drooled on the keyboard a little!

And don't let the thin chocolate turn you off. The taste was great. You could add cocoa powder to this recipe and it would turn out just as pretty. As you know I like to go overboard with the chocolate and that's what caused the meltdown.

Anyway, here is the recipe I used for candycane flavored meringues. This made enough to fill my oven and I usually threw away quite a bit too so you can decrease as necessary. The reason I always made 6 egg whites is that's what I had leftover from making cakes conviently enough. You may be able to make this with the Meringue Powder sold in stores, but I haven't tried. Since the eggs are cooked, I think using real eggs are okay, but that's just my opinion. I know some people are scared of eggs. I don't judge you if you don't judge me.

Meringues Recipe (adapted from AllRecipes)

Ingredients

  • 6 egg whites
  • 1/4 teaspoon cider vinegar
  • 1/4 teaspoon salt
  • 1 cup white sugar
  • 3 peppermint candy canes, crushed

Directions

  1. Preheat the oven to 225 degrees F (110 degrees C). Line cookie sheets with aluminum foil or parchment paper. This is a necessary step as they are pretty hard to get off the sheets and you don't want to use any kind of grease.
  2. In a large glass or metal bowl, whip egg whites and vinegar to soft peaks. Gradually add salt and sugar while continuing to whip until stiff peaks form, about 5 minutes. Spoon into piping bag with large star shaped tip. Pipe into small mounds about 1 inch apart on cookie sheet. Sprinkle candycanes over top of the meringues.
  3. Bake for 60 minutes in the preheated oven. Allow to remain in oven for several hours or overnight to dry out completely.

If you try some flavors I didn't think of, let me know. I'm always interested in new ideas!

Monday, December 20, 2010

Things to come and a link-a-long

So I know I've been the worst blogger ever. That's what happens at the holidays - I fall off the Earth as far as communicating. Too much going on in too little time. Add to that some kid illness and I'm officially overwhelmed.

Anyway, I wanted to check in and report that I officially LOVE my Cricut Cake! I'm working on getting some more practice in and some great pictures. Here is a cake I made for a carry-in for some coworkers (one was quitting, one had a birthday) which has a good example of what I can do. It is so easy but I just haven't had enough play time. Expect amazing things to come!


Also, I am participating in a fun idea - a link-a-long where you link to each other's pages. This is a super-fun cheap crafty website. I love cheap! I love crafts! Perfect combo!! Check out Me Making Do for great ideas!

Monday, December 6, 2010

Candy Cane Cupcakes

I know I've been pretty slow posting lately. Welcome to the holidays! It's pretty hectic around here, to put it mildly. But I have definitely been busy baking. I made the first of my Christmas cupcakes - candy cane!

The idea behind it was pretty simple. I used my go-to cake recipe and just tweaked it for these cupcakes. Because it's made for layer cakes, it made a LOT of cupcakes, but it's such a perfect cake I didn't care.

I added a little peppermint flavoring and probably 2/3 of a bag of chocolate chips. I also crushed up the candy canes a little coarsely the first time. You can tell by the picture. The second round, I crushed them fine and it turned the cake mix pink. I actually liked that better. I also used both chocolate and vanilla buttercream. I think everyone liked chocolate best. Imagine that!

Overall, these were a simple cupcake to make but they were a pretty big hit!


YUMMY!!

I bought a Cricut Cake Mini on Black Friday and have been very busy playing....I mean WORKING with that. Expect quite a few CCM blogs to follow as I learn how use it.

Tuesday, November 9, 2010

Malted cupcakes and a special anniversary cake

This week was about celebrating my mom. She has been clean and sober for 26 years! That's pretty impressive, I think. So her girlfriends wanted to have a party and guess who she volunteered to make the cake? Yup.

In addition to that, my husband's office had an open house that he wanted me to make cupcakes for. Busy week when you factor in the day job, school and 3 year old! But still, if I didn't enjoy it, I wouldn't do it. I decided to take advantage of the cupcake order as an excuse to try out a new flavor - chocolate malted. I actually chose it for several reasons - it's been requested, we had lots of leftover Whoppers from Halloween, and (most importantly) it's one of my mom's favorite flavors. Next to licorice which I refuse to make because it's gross.

So, I kept it pretty simple for these cupcakes, I found a great cake recipe on the Food Network website but it wasn't "malted" enough for me so instead of the recommended frosting, I made a malted buttercream. I had malted bits I found a while back at the cake shop, but you could easily make them by mashing up some malted candies. I think it would have been better to add them to the cake as they made the icing look like nutty poop (sorry if that's a gross thought, but it's true!) and they blocked my piping tip which made frosting very difficult.

Malted Buttercream
2 sticks butter, room temperature                                   1/2 cup malted milk powder
1 tsp Vanilla extract                                                        2.5-4 cups powdered sugar

Blend butter and vanilla together until smooth. Add malted powder. Gradually add powdered sugar until frosting is desired consistancy.

They went over pretty well, but who doesn't like chocolate? No one I know, that's for sure! Here's what they looked like nestled in the box with all their cupcake friends. One big happy sugar family!

Like I said, I also made a cake for my mom's party. I had this spray on color that I had bought a while back and was aching to use up before it went bad. So I decided to make plain fondant and spray it green. It worked great, but when I added the flowers and letters, it was impossible to moisten it enough without ruining the green. Yeah, I learned it the hard way. Luckily, the only pictures I have are from the camera phone, so you can't tell! I'm going to call that another lesson learned the hard way. That's what the Cake Chemist project is all about after all.

So, after all this baking for others, I was offered a job making Christmas baskets for the company and I'm making lots and lots of cupcakes next week for my laboratory's bake sale to raise money for our Adopt-A-Family. If you happen to be in Dayton Children's Hospital next Tuesday November 16th, stop in for some tasty treats. Otherwise, check back in a week for an update on how it went. I plan on trying out some more vegan cupcakes and some sugar-free treats of some sort. Also maybe I'll start on Christmas flavors....we'll just have to see what inspires me at the grocery store this weekend!

Wednesday, October 27, 2010

How to vegan to say thank you...

I had a friend come by with his truck and take my husband to pick up this piece of furniture for us. I can't imagine being a truck owner. Always doing favors. My husband hates bothering people with trucks because he thinks they hate when people use them for their vehicle. He's probably right, but since we don't have a choice, it had to be done.

Anyway, I wanted to make some thank you cupcakes. The problem - he's a vegan. I've been thinking I need to learn how to make vegan cakes anyway since I have lots of friends who have made this commitment. I envy them for their ability to stay true to their beliefs. I live with two meatatarians who would never allow a meat-free house let alone going vegan. Plus, I have a very deep rooted and serious love of cheese. A life without cheese? No thanks.

But, this wasn't about me. So I turned to one of the best resources for recipes - allrecipes.com. I like the fact that people post their own recipes so you get variation. The best part about the website, though, is the reviews. I'm skeptical about making anything without hearing what others think first. Luckily, they had a vegan recipe with good reviews and reasonable ingredients.
One of the most important things I learned from reading the reviews is that vegans do not eat sugar because apparently it is sometimes processed using animal bone. I went to the grocery store looking specifically for vegan sugar. What I found was a natural unprocessed sugar (for a couple extra dollars of course!) that would work. The problem was with the powdered sugar. It's made out of granulated sugar so the same non-vegan processing is possible. I didn't find an alternative but, luckily, my friends don't mind the use of regular sugar so on this one ingredient I may or may not have been completely vegan.

The cupcakes were so soft and moist, I love them! I was a little disappointed with the flavor. I added seasonings to make it more like a spice cake and, although delicious and not at all plain, it was not as flavorful as I had hoped. Definitely a recipe that is easy to make and easy to adapt into all different kinds of cakes.

Vegan Spice Cupcakes - adapted from Allrecipes

Ingredients
1 tablespoon apple cider vinegar

1 1/2 cups almond milk

2 cups all-purpose flour

1 cup white sugar (vegan?)

2 teaspoons baking powder

1/2 teaspoon baking soda

1/2 teaspoon salt

1/2 teaspoon apple pie spice

1/2 teaspoon ground ginger

1/2 cup olive oil

1 1/4 teaspoons vanilla extract


Directions
Preheat oven to 350 degrees F (175 degrees C). Grease two 12 cup muffin pans or line with 18 paper baking cups.


Measure the apple cider vinegar into a 2 cup measuring cup. Fill with almond milk to make 1 1/2 cups. Let stand until curdled, about 5 minutes. In a large bowl, Whisk together the flour, sugar, baking powder, baking soda, spices and salt. In a separate bowl, whisk together the almond milk mixture, oil and vanilla. Pour the wet ingredients into the dry ingredients and stir just until blended. Spoon the batter into the prepared cups, dividing evenly.
Bake in the preheated oven until the tops spring back when lightly pressed, 15 to 20 minutes. Cool in the pan set over a wire rack. When cool, arrange the cupcakes on a serving platter. Frost with desired frosting.

The reviewers also told me they wouldn't rise much. I was surprised how much they actually did rise. I would suggest filling the cups about 2/3 full.
I topped the cupcakes with a pumpkin icing ('tis the season!) to make a nice flavor addition. I made the icing as follows: 1/2 cup pumpkin puree, 1 tsp vanilla extract, 4-6 cups powdered sugar. I added the sugar until slightly stiff. The icing was still pretty liquid and I applied with a teaspoon in a dollop and allowed to firm as it cooled.
The end result was cute and tasty...and a nice thank you if you ask me!


Tuesday, October 26, 2010

What's better than pineapple upside down cake??

Double layered pineapple upside down cake of course!!

Last weekend was my (not so) little brother's birthday. He said he wanted pineapple upside down cake. Now, the only way I've ever had this, was someone made a huge 9x13 pan of mush at the bottom and yellow cake mix on top. So, I decided to make this a challenge. A "classy" version of PUD cake. Is such a thing possible?

Well I searched the internet for a double layered recipe and they were all basically the same - cake mix with brown sugar, pineapples & cherries on bottom. So I used that for the topping and made my standard vanilla cake using the recipe from my favorite classy lady. My brother requested extra cherries so I added a lot to one of the cakes. I also used crushed pineapple for that layer and rings for the other one. That makes a middle & top layer.

When it was done, I let them cool completely in the pan. Mostly because I was short on time and afraid of a disaster. After I removed from pan and stacked the layers, I noticed two things. First, the butter and sugar from the top was running down the sides. Second, they didn't stack together nicely as I imagined. The runny topping was solved with a paper towel. It wasn't too bad, just enough to bother me. The problem of curved sides on the cakes, however, was a little bit more tricky. This may have been because of my pans or the way the cake baked. I'm not too sure.

Anyway, I decided to add some frosting. I made some pineapple buttercream (see my post about the frosting here) and used it to even out the sides and make a nice stacked look. I obviously didn't want to frost over the top. That's one of the best parts about this cake. So I just iced up the sides, piped a little around the edge and decorated with cherries. It came out pretty nice, I think. Here's what it looked like.


Once we cut into it, I noticed the center was a little undercooked and, with the addition of the fruit, it got soggy after sitting through birthday dinner. So, I secretly cut out the middle while no one was looking! So much for being professional! Ha ha!


It tasted great and looked pretty good too, aside from the middle which is easily resolved with baking a little longer. Unlike a plain cake, this cake will not dry out if slightly overcooked, which I should have realized. Live and learn, that's what this is all about!

Thursday, October 21, 2010

The good, the bad, and the adorable!

It's pumpkin time! I've been buying up some canned pumpkin like crazy. The trouble is, I haven't found a recipe I like enough to use it! Plain old pumpkin pie. Not for this momma! I like it and all, but it's everywhere. I want something new and different.

Enter Martha. You know how I mean. She only needs one name. Well, if you go to her website, you can get on a mailing list for daily recipes. I'm on the cookie list. Which is ironic because I literally can't remember the last time I made cookies.

Martha e-mailed me a recipe for some pumpkin cookies that sounded pretty good and had me actually considering making them. Then I read the reviews. I highly recommend you do this too anytime you get a recipe from a website. Most people will make changes for the better. Some people are a little technically-challenged and you can get an idea of what might go wrong from the complaints. Well, this recipe most people complained the cookies were too "cakey" and fluffy. One or two people said they made them like cupcakes and they were great. I'm pretty sure you can see where this is going...


Pumpkin surprise Cupcakes - adapted from Martha Stewart

2 3/4 cups all-purpose flour
1 teaspoon baking powder
1 teaspoon baking soda
1 1/4 teaspoons coarse salt
1 1/2 teaspoons ground cinnamon
1 1/4 teaspoons ground ginger
3/4 teaspoon ground nutmeg
3/4 cup (1 1/2 sticks) unsalted butter, softened
2 1/4 cups packed light-brown sugar
2 large eggs
1 1/2 cups canned solid-pack pumpkin (14 ounces)
3/4 cup evaporated milk
1 teaspoon pure vanilla extract
1/2 cup chopped walnuts
1 bag (8 oz.) butterscotch chips

Directions:

Preheat the oven to 375 degrees. Whisk together flour, baking powder, baking soda, salt, cinnamon, ginger, and nutmeg in a medium bowl; set aside.


Put butter and brown sugar in the bowl of an electric mixer fitted with the paddle attachment. Mix on medium speed until pale and fluffy, about 3 minutes. Mix in eggs. Reduce speed to low. Add pumpkin, evaporated milk, and vanilla; mix until well blended, about 2 minutes. Add flour mixture; mix until combined. Fold in walnuts and butterscotch chips.


Pour into lined muffin tin. Bake for 15-18 minutes until browned on top. **because this is actually a cookie recipe, mine came out a little gooey at the top, but I cooled in the pan and they were good to go once they cooled down.

I topped it off with a cream cheese frosting from a recipe I found here. It was the perfect topper - not too sweet. The pumpkin flavor was very subtle and even my friends who aren't pumpkin lovers (how can such a thing be?!) enjoyed them. So this was definitely the "good" as referenced above.


So yummy!!

Now, what is the bad? Well, when I tell you what I tried to make, you'll probably think "Duh! You thought it would be good?" But I'm an optimist I guess.

So I was flipping through my new favorite cookbook I mentioned in an earlier blog and I came across an avocado & olive oil cupcake. Now, I realize this isn't a cupcake technically. But I love avocados. I mean, I'll go to a fat daddy burrito restaurant just for the guacamole. Forget the chips or burrito. So when I saw this, I thought hell yes, this is for me!


Wrong.

There was no sugar which didn't strike me as odd but was definitely missing in the final product. The avocado was such a big part of the recipe, that it came out almost slimy. Not to mention how ugly they looked. I think my camera agreed as this is the best shot I could get.


I'm not giving up on this. I'm going to sleep on it for now and try to figure out how to make this as good as I wish it to be. Expect more on this once I figure it out.

And now, the adorable - my assistant. She's great at licking batter and smearing flour on the counter. She's my taste tester. I apparently should take her opinion more often as she wouldn't even try the avocado cupcakes!

Here she shows her skills at cleaning the beaters.


Saturday, October 16, 2010

Holy Split! - Part II It all comes together!

Now that I have banana & strawberry cupcakes (see previous post), I moved on to the rest of the flavors. Like I said before, I definitely wanted chocolate, but I didn't want this to turn into a chocolate cupcake with banana flavor. So I decided to make a ganache to go in between the frosting and the cupcake.

I doubt I need to actually say this, but I am NOT the kind of person who knows about something as fancy as "ganache". But I know people who are and they told me about it. Basically, it sounds like a big deal, but it's just solid chocolate (like chips) added to milk or cream and heated to mix together. Not too big of a deal really. I had a recipe in the book I was already using so I thought I'd try it. It's probably something that should have been easier, but I thought it was too runny so I added more chips (when in doubt - add chocolate!) and made it really thick. Basically it's like a semisolid chocolate when I was done. For safety, I taste tested it. It definitely passed!

So, I put a little dollop on each cupcake right in the center like this.

I then flattened it out to kind of hide it inside the frosting.

For the remaining flavors - pineapple, whipped cream, nuts & cherry - I decided to make a pineapple buttercream topped with nuts & a cherry. I figured buttercream is close to whipped cream, right? I found a pretty simple recipe here which I of course tweaked a bit. I'm not sure if I added too much pineapple or if it was just too warm in my house but the frosting settled a bit after I piped it out. The final product definitely had the look of a sundae with the cherry & nuts on top!


Here is a picture of the inside so you can see all the different elements. Like I said, it's a little warm right now (why is it in the 70's in October?!) so they aren't as pretty as I'd like, but still cute and definitely tasty! My coworkers were kind enough to taste them and give me feedback. They were all impressed with it and said it did taste exactly like a banana split!


Friday, October 15, 2010

Holy Split! Part I - Cupcakes

Since I have newly renamed myself the CUPCake Chemist, I decided to take that and run. And I'm having so much fun! The cupcake idea is nothing new, but what you can do in a little paper liner is amazing!


This week, I decided to make a banana split! Now, I'll be honest, I'm not the biggest fan of the real thing. Mostly because wherever you go to buy one, they probably sell something I'd like much better. Like a candy-bit mix or brownie sundae. But I like all the flavors and if I were to see something that has the flavor of the split, I'd probably say "Yes please!" And, that's why I wanted to make this. Well, that and it's a pretty impressive cupcake flavor.

So, my first step was to actually list the ingredients. I probably should have gone to DQ and bought one. For research, of course! I'll definitely have to remember that next time. For now, I just used the number one source of information - Google. From my extensive (45 second) research, I decided to include the following flavors: banana, strawberry, pineapple, cherry, chocolate, nuts and whipped cream. That's a lot of flavors in a little package!


The thing about putting chocolate in anything is that it tends to take over. Don't get me wrong, I love that most of the time. But the magic of a banana split is that all the flavors are present in one bowl (or cupcake). So I designed this cupcake with that purpose in mind.

Luckily, last weekend I came accross this book at B&N bargin bin. It is amazing!! (Find it here on Amazon.) Expect LOTS of recipes from here to appear in future blogs. The one I used this week was actually a coconana cupcake without the chocolate chips.


I added in some strawberry jam before baking. It's important to swirl it in at the end for two reasons: first, if you just mix it beforehand, you'll loose the flavor and just have pink tint to your banana cupcake and second, if you just drop it on top and don't swirl, it will sink to the bottom and make a mush center. I know these facts because I've done each and had cupcake failure!


When they were done, I had yummy banana strawberry swirl cupcakes. Which would be great on their own. Because of the banana, the cupcake is very dense and moist. It doesn't rise as much and wasn't as brown as I'm used to when it's done. Although it seems pretty brown in the picture, you'll have to trust me, I had to hold back from over baking these.


Next blog - assembling all the ingredients in one tasty little cupcake!

Monday, September 27, 2010

S'more cupcakes - Part II Cupcake

My goal for this cupcake was to be as like a s'more as possible. I wanted all 3 elements (chocolate, graham & marshmallow) to exist individually and combine in your mouth like they would in the real thing. Most of the recipes I found, however, were chocolate graham cupcakes which tasted more like a chocolate cupcake with a very slight hint of graham. Like the marshmallow frosting (see previous post) I ended up making 3 different recipes until I came to the one I liked.


The first was a recipe I found for vanilla graham cupcakes with chocolate pudding. It wasn't what I wanted since it had chocolate mixed in, but I thought it would be so moist that it was worth trying. Once I had started making it, I realized the pudding was added AFTER the cupcakes were done! Basically, you made cupcakes, cut them in half, and inserted a pudding center. I definitely didn't want to do that, so I mixed in chocolate chips instead. Well, they didn't rise much and came out pretty dry. By the next day, you could have used them as a hockey puck!


The next recipe was from a famous bakery known for fun cupcake flavors, including s'mores. It also had the chocolate mixed in (as cocoa powder). This was definitely more of a "cakey" flavor but you could barely tell the graham was in there.


The final (and winning!) recipe was basically a recipe I made up using a little bit of each previous recipe. I definitely liked having chips versus cocoa powder to keep the chocolate and graham flavors more separate. I added an egg yolk to make it more moist since the graham crumbs are pretty dry. The overall flavor actually resembled a chocolate chip cookie so you could call it that too if you wanted I guess!


Here is the recipe. Keep in mind, I made this up as I went so if yours doesn't turn out how you want, you might need to tweak it a little!


Graham & chocolate cupcakes

½ cup (1 stick) butter, softened
1 cup sugar
1 whole egg & 1 yolk
1 tsp vanilla extract
1 cup all purpose flour
1 cup graham crumbs
1 tsp baking soda
½ tsp salt
1 cup buttermilk
1 bag choc chips (I used mini chips)

In a small bowl, cream butter and sugar until light and fluffy. Beat in egg, yolk and vanilla. Combine the flour, graham, baking soda and salt; add to creamed mixture alternately with buttermilk. Graham tends to be clumpy so be sure to mix well.


Bake at 375° for 12-15 minutes until browned on top. Cool for 10 minutes before removing from pan. Makes about 30 cupcakes.

S'more cupcakes - Part I Icing

This recipe turned into a serious project! Three attempts later, I finally have an amazing cupcake! First of all, I found several different versions of both cupcakes and icings. So I tried several and came up with a tweaked version for my own.


Let's start from the top - the icing (or frosting - what's the difference anyway??) I wanted to have a serious marshmallow flavor. I first tried a recipe that required a double boiler and actual marshmallows cut into bits. Since it included marshmallows, I thought it would be the best. And, I have an original Chocolate Factory double pan! Yes, "As seen on TV"! The recipe had several good reviews and sounded like exactly what I wanted. Maybe I did something wrong, I don't know but my icing turned out pretty runny. I think it would have worked great for a cake, but cupcakes need an icing that can stand on it's own. Here's a glimpse of the first draft cupcake:


Doesn't look too bad, but not the fluffy frosting look I wanted. And the taste was just okay.

Next I tried to make my own fluff and use that in a recipe. Making marshmallow fluff proved to be super easy (and tasty!!) so I would recommend it to anyone. There's several websites with recipes and they are all about the same - egg whites (or meringue powder), corn syrup and powdered sugar. The fluff was perfect, but when I tried adding extra sugar to make it more stiff, I ended up with an icing that looked like it would be perfect, but actually slowly lost all shape. Within an hour, the cupcakes were completely coated with marshmallow. I mean completely - even the paper!! So here's the second (failed) attempt at MM icing:


YIKES!

So after searching around and looking at different recipes, I found the one that worked for me. Of all places, it was on Rachael Ray's website. I am definitely NOT a fan of hers. I can't say why for sure, she just seems really annoying to me. But anyway, apparently she (or her staff) knows something about icing!


Simply put, this recipe is a buttercream with reduced sugar and added fluff. I changed it a bit to be a smaller batch and added a bit more marshmallow. I think adding marshmallow flavoring wouldn't hurt since marshmallow generally just tastes like sugar on it's own. Plus, it would probably be better s'more flavoring if I toasted it. I've read some people will put the frosted cupcakes into the broiler and brown the tips but I don't trust my broiler to work right. Sounds like an excuse to buy a new kitchen gadget! Anyway, here's the recipe as I did it and I liked the flavor without the aforementioned improvements:


Marshmallow Frosting

1 cup (2 sticks) butter @ room temp
1 cup powdered sugar
¼ tsp vanilla extract
1.5 cups marshmallow fluff (I made mine but you can use store bought)

beat butter until creamy
add sugar slowly, beating until creamy
add vanilla then slowly add fluff

And here's the final product:


Exactly what I was looking for! Like I said, toasting would have definitely made a great cupcake even better, but it was given the thumbs up by everyone who tried them!

Thursday, September 23, 2010

CUPcake Chemist???

Well, I'm jumping on the bandwagon! I'm officially in love with cupcakes. For several reasons -first of all, everyone loves them too! You bring a cake to someone and they'll love it. You bring cupcakes and they will be eaten in minutes! Not sure why exactly, but that's the truth. Plus, you can do so much more, it's easier to divide it up among friends & coworkers, and they're just so darn cute!!

So I've decided that every week I'm going to make (at least) one new cupcake. This weeks challenge - S'mores! To be honest, I tried it over the weekend and it was another delicious fail. The cake was a little dry (too much graham) and the marshmallow just turned to liquid and oozed over top. Not the cute s'more-ish look I was going for. So here's to attempt #2.

Stay tuned for more cupcake adventures!!

Tuesday, September 21, 2010

Progress....

My next frosting drawing attempt was for a double birthday cake for my girlfriend and her cousin. He is a huge Bengals fan (as am I) so I made a Bengals logo. I tried doing the same wax paper tracing as before but freezing it once dried. I had the same messy result.

Then I did it again but first put a layer of powdered sugar down on the wax paper, let it dry for an hour and put it in the freezer. I pretty much wanted to cover all the bases! Well, it worked much better, but I wouldn't say it's 100% successful. I managed to get most of the design off and onto the cake, then I freehand piped in the missing side (on the right obviously). It came out not too bad. I wasn't ashamed to give it to them at least.

Ironically, after all that work (and it was HOURS in between each attempt) I realized I have a projector! DUH! So next attempt will be onto the cake which should solve all these problems and result in a cake that will BLOW YOUR MIND! Ha ha!

Monday, September 20, 2010

Great idea...okay cake

I was asked to make an Ohio State wedding shower cake. I was pretty excited about this because it combines my two favorite things - a football team I love & cake! As usual, the internal parts of the cake were easy peasy. I made a basic chocolate butter cake with chocolate buttercream between the layers. I iced the outside with classic buttercream. As I'm sure I've said before, I hate piping icing and I pretty much suck at it. So I opted for doing little dots around the outside ring. I was going for a wedding cake look.

The bad part is the chocolate inside was trying to ooze a little and when I iced around the outside, I kept noticing a dark ring where the chocolate layer was in the middle. I put ribbon around to hide the darkness. To be honest, this might have been one of those things where no one else would have noticed but it drove me nuts!

Now came the fun part. I wanted to incorporate the OSU logo but I didn't want it to look like the groom graduated or something. I came up with lots of ideas, but the one that sounded best to me was to link two OSU "O"s to look like linked wedding rings. I first printed out the logo and cut and pasted them to look like what I wanted. Then I made up some royal icing and piped it onto wax paper.


Here is when things went horribly wrong. It seemed like a great idea. I know from reading (and personal experience) that royal icing will dry to an incredible hardness. Unfortunately, if it's sitting on wax paper, it stays moist underneath. So, when I tried to remove the decoration I made it came apart completely. I was so upset about this, I almost had a breakdown. Due to time restraints, I had to just pipe it on top of the cake. It came out like this. I hated it. But I also became determined to do better.

Expect more tales of my piping adventures. I'm going to get this icing to work if it kills me!!

Sunday, September 5, 2010

Beer + Chocolate = Yes please!!

A few weeks back we had a house warming party and my friend Rob brought us the funnest gift -a 6 pack mix of random beers! Obviously Rob knows who he's shopping for. Well one of them was a raspberry ale which I thought would be great in a cake. Why not.

I looked around and found a recipe from a fellow blogspotter - http://freethoseradicals.blogspot.com/ which used Guinness as an ingredient. Well, I'm actually not that into Guinness (don't tell my Irish relatives!) but I do love the idea of booze and cake! I'm thinking it would actually have lended a great flavor. Maybe I'll try it that way sometime later.

Here is my modified version. Note that I had to add more chocolate because there's never enough! Clearly it was agood call because everyone LOVED them! I made 4 different kinds of cupcakes for the party and these guys were all snatched up. I'd say that's pretty good proof!

1 cup of ale (or stout!)
2 sticks of butter
3/4 cup of cocoa powder
1 large bar of Special Dark chocolate melted (I used one of those huge baking bars)
2 cups flour
1 3/4 cup white sugar
1/2 tablespoon baking soda
1/2 tsp salt
2 eggs
Rounded 1/2 cup of cream cheese

Preheat oven to 350 F. Melt chocolate bar and set aside. Melt the butter in a saucepan. Whisk in the cocoa powder, and add stout. Slowly wisk in melted chocolate. Let the mixture cool. Blend flour, sugar, baking soda, salt together. In a large bowl, beat eggs and cream cheese together. (**This is much more difficult than I thought it would be. Maybe nuking cream cheese in the microwave would have helped) When blended, add the stout/chocolate mixture to the eggs about a quarter cup at a time, and blend, continuing this step until the eggs are tempered. Add the flour mixture and stir until well-mixed. Fill cupcake liners about 2/3 full. Bake about 20 minutes. Yields approx. 24 cupcakes.

These cupcakes turned out more like brownies. Probably the chocolate bar. I think next time I make these (and there will definitely be a next time!) I will make them in mini cupcake pan like brownie bites.

I made up a simple chocolate icing with orange flavor to go on top but really it doesn't need any icing. If I'd had more time, I might have made up a dark chocolate icing just to make it over the top tasty!

The Most Delicious Fail (so far!)

My husband loves cherries. Pretty much anything cherry. Even that artificial flavor that I think tastes like cough syrup or throat drops. Not sure what to say about that exactly. He's weird. Anyway, I found this recipe for a chocolate cherry cake made with cherry pie filling on allrecipes (http://allrecipes.com/Recipe/Cherry-Chocolate-Cake/Detail.aspx) that sounded awesome. Probably if I had just followed the recipe and made the cake, it would have been perfect. But that's not my style! I did follow the recipe, except I added chocolate chips. Because I believe less is not more - more is just enough! Then I made it into cupcakes. Because I'm currently obsessed with cupcakes. And I had to make some for the bachelorette party this weekend so I figured they would be a hit.


Well, it was so good! But structurally, it was such a fail. The little paper cupcake wrappers couldn't hold all that goodness and they ended up looking like this.


The taste was AWESOME!! I took them into work and everyone loved them. Actually, we loved them too much which is why I wanted them out of the house!

I'm thinking I'll try this again. As a cake. Probably I will still add more chocolate. Because there is no such thing as too much chocolate in my opinion!

Product Review - Wilton Easy Pour Funnel

I saw this funnel and thought it was a great idea. I'm pretty much notorious for being messy so I'm interested in anything that can help. Also, I bought it off Amazon (http://www.amazon.com/Wilton-1904-552-Easy-Pour-Funnel/dp/B001689LD2/ref=sr_1_1?ie=UTF8&s=home-garden&qid=1283723097&sr=8-1) for about $4 so it was worth trying.


When I first opened the package, I was disappointed by the plug mechanism. It's basically just a piece of plastic you manually slide up and down the side to stop the flow through the funnel. I guess I expected it to be spring loaded or something so that it would be plugged all the time. But besides that, it was pretty much what you'd expect. I can't use it for cupcakes with any kind of solid bits (fruit, chocolate chips, etc.) but I used it for a few that I made this weekend and found it worked okay. A little messy, but about 1/2 of the usual mess, so that's nice.


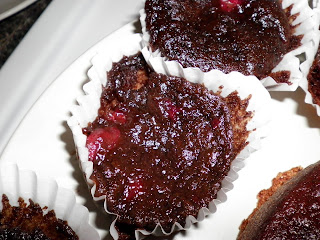
It did have the unfortunate effect of making chocolate look like this.


I work in a medical laboratory. I see enough of that throughout the work week! HA HA! But, after baking, they did turn out nicely.


All in all, I think it's probably worth the $4 but not much more than that. Maybe if I get into candy making or something like that, this would be more handy.

Friday, August 27, 2010

Baby Belly!

Ok, I first saw this cake on craftster.org. I thought it was such a cute idea! But the baker of that cake said she used the Wilton ball pan for the belly and the mini dome (doll dress) pans for the boobs. I considered buying the pans. Ok, really, I went to a couple of stores looking for them. Not Hobby Lobby which I know would have it or the cake store which, being a cake store, would likely have them. I went to Joanns and Walmart. They didn't have them. I took that as a sign I should spend the pan money on a new mixer instead!

So, I decided to wing it. I'm a fairly resourceful person by nature, so I figured I could do this. Somehow. I have a bundt pan which I used for the belly and I picked up a couple of ceramic souffle cups for the boobies. I have never baked anything in ceramic before. So I thought I could just overfill the cups and they would mound up like boobs. Wrong. What I got was a baked mess and a pile of burnt cake batter on the bottom of the stove. Thankfully, for once in my life I thought ahead and had a pan underneath!

After making the main bundt and two completely flat souffle cakes, I wrapped them tightly and stored them. Ihad a few days to finish and I wanted to plan how to make this happen. I originally thought I could just ice or fondant over the bundt hole and make it a belly. But I had visions of a perfect cake developing a hole as I drove it to the party. Ok, more like nightmares!

So, what I came up with was to put foil over the small end of the bundt "hole" and fill it with batter, baking a core cake.

This worked much better than I had imagined. I also found little pot pie pans that are made to be disposable for about $1 which were perfect toppers to the souffle cakes.

I was so amazed how well it worked together when I did the first buttercream layer to set it all up.


Next I rolled out fondant and covered the whole thing in a dress. The mommy-to-be loves pink so I wanted to make it pink. In retrospect, I think that was a bad idea because it basically looks like skin and when you have flesh-colored boobs on your cake, it's taking a turn towards bachelor party. But luckily, I was not bothered by the jokes that came with. Actually, it was part of the fun ("Did you get some boob? Oh, and did you have any cake?")


In the end, it turned out so well I was so impressed with myself! At first, everyone thought I bought it. I think that's the best compliment I could ask for at this point!

Cupcake Madness!

So, since I'm getting (a little) better at decorating cakes, I thought I'd shift my focus to the cake flavors. I decided to try out a few different recipes and choose my favorite. I'm actually still not sure which is the best. But in the process, I made a million cupcakes this week. Both of our coworkers were pretty happy about that since we each brought in trays of cupcakes. I can't have things like that around the house!


I also found a very cute idea from a message board on craftster.org about sushi cupcakes. The poster had actually bought bento boxes and that green "grass" plastic that comes in sushi so hers looked very real. I made a more candy version for my sister-in-law who just came home from a year in Japan.

I used a green tea cake recipe which was a hit all around (I also took that to work) and I iced it with a maple ginger icing. The icing tasted great but was a recipe that was a complete fail. It is supposed to start with warm milk & flour and make a paste. Mine made more like clay with flour chunks. so I just kept adding things to make it better. It still had some chunks, but no one (except me!) seemed to notice.

I had another failed icing recipe for peanut butter frosting from all-recipes.com. This is one of my favorite sites to go to for recipes. Usually. Sometimes you get a dud. Well, it was pretty basic, with peanut butter, butter, powdered sugar and a little milk. But mine basically turned into a peanut butter crumble. So, once again, I just kept adding things. Mostly more sugar. Then I decided to add 3 egg whites that were beat stiff. That was perfect!! This is my new go-to peanut butter frosting recipe which is made up and everyone LOVED it! Especially when I topped the double chocolate cupcakes with it!


So, this is round one of cupcake craziness as I search for a perfect cake & frosting recipe. I expect I'll have to do this again soon as I read more. In the meantime I have a couple of occasion cakes to make...